Why Your Dometic RV Thermostat Isn’t Working — And the Smart Fix That Ends the Guesswork
There’s a certain kind of silence that settles in an RV when the thermostat gives out. Not the peaceful kind. The kind that hums with anxiety. The air turns thick. The dogs start panting. The furnace won’t kick in. And no matter how many buttons you mash on that stubborn little Dometic box, nothing changes.
A quick but critical note: The specific diagnostic steps, error code meanings (E1, E7, E8, E9), and reset procedures described below are based on Dometic’s proprietary Comfort Control Center (CCC/CCC2) and Single Zone system manuals and troubleshooting guides. These procedures are unique to Dometic and may not apply to HVAC systems made by other brands.
I’ve spent three decades wrestling with HVAC systems—from million-dollar commercial installs to crouching under fifth wheels with a flashlight and a fuse puller. I’ve replaced more thermostats than I can count. And in RVs, especially those running Dometic gear, I’ve seen one failure point come up over and over again: digital communication dropouts and invisible power problems that leave owners stranded with nothing but a blank screen.
So if you’re reading this with your brow furrowed, wondering why your Dometic RV thermostat isn’t working—let’s cut through the static and find the real problem.
The Great Divide: Analog vs. Digital Systems
Before you grab a tool, you need to understand the fundamental difference in Dometic’s design. It dictates your entire troubleshooting path 1:
- Analog (Older/Basic): These are simple 12V DC systems. The wall unit uses basic switching logic—it completes a 12V circuit to tell the rooftop control box, “Turn the fan on,” or “Ignite the furnace.” Troubleshooting these involves checking continuity and power at the switch contacts.1
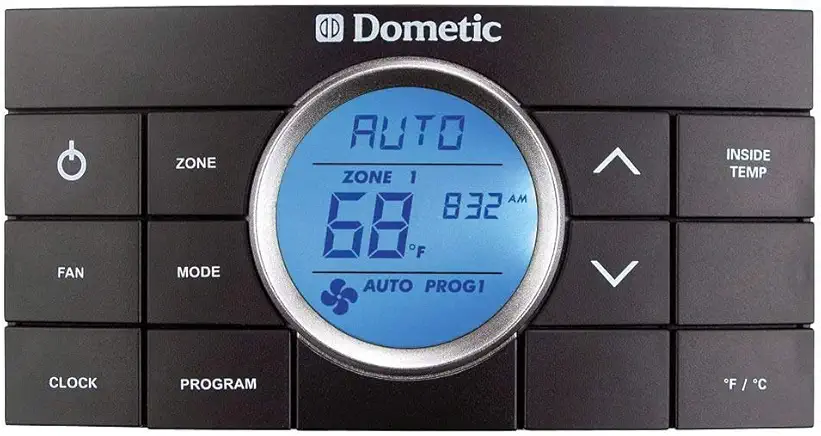
- Digital (CCC, CCC2, Single Zone LCD): These are mini-computers that manage multiple zones and functions via a low-voltage data cable, typically an RJ-11 telephone-style cord.1 This complexity allows for error codes and feedback, but it also means a minor communication fault can cause a total system shutdown.
The Most Common Failure: Blank Screen, Invisible Power Loss
If your Dometic thermostat display is completely blank or dead, odds are high you’ve lost 12V DC power.1 But here’s the catch that trips up 90% of RV owners:
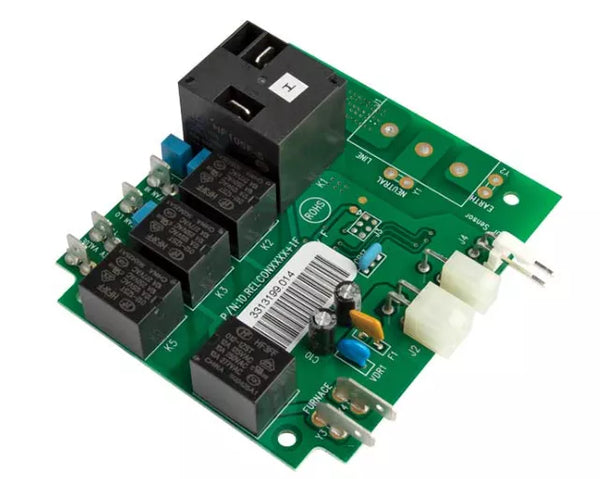
That 12V DC power doesn’t always come directly from your main RV fuse panel. In many digital Dometic systems, the 12V required to run the thermostat’s display and logic is routed from the A/C control board on the roof, traveling down the communication cable.1
If you find a dead display after checking your main RV fuses and battery health, you must next investigate the one single point of failure no one talks about: a blown 1-amp fuse or resettable breaker located directly on the A/C control board itself.5 If that localized fuse blows, your thermostat display goes dark, and the problem is on the roof, not in the wall.
Expert Fix: The Definitive Jumper Test for Analog Systems
If you have an older, analog system and the unit won’t turn on, you don’t need to guess if the control box or the thermostat is the culprit. You can bypass the thermostat entirely to isolate the fault.
Safety First: Disconnect shore power and battery power before touching any wiring.6
- Access the control board inside your rooftop A/C unit (or the corresponding analog control box).
- Locate the terminal strip labeled with functions like GND (Ground), FAN, COOL, and FUR (Furnace).7
- Use a jumper wire to bridge the GND terminal to the terminal of the function you want to test (e.g., GND to COOL or GND to FAN).8
If the appliance (fan, furnace, or compressor) kicks on when you manually bridge the connections, the analog control board and the appliance are confirmed operational. This isolates the fault with 100% certainty to your analog wall thermostat.8
Error Codes That Actually Mean Something
Not all failures are silent. Sometimes, your Dometic unit gives you a breadcrumb—an error code flashing on the display. These codes immediately point you to the diagnostic path.
| Code | Meaning | Expert Diagnostic Focus |
| E7 | Loss of 120V AC Power (All Zones) | This is a gift. E7 proves the 12V DC system and communication line are working, but the high-voltage power needed to run the compressor is gone. Check your campground pedestal breaker, your RV main breaker, and the transfer switch. If the A/C runs on the generator but not shore power, your transfer switch is highly suspect. |
| E1 | Loss of Digital Communication | This means the thermostat and the upper control board(s) can’t talk. The single most common technical cause is physical corrosion on the RJ-11 phone connectors, especially in Penguin model rooftop units after a few years of high humidity. You need to inspect and clean the cable ends at the wall and at the control boards. |
| E5 | Out-of-Range Freeze Sensor | The temperature sensor has failed or gone out of range.[9] The system locks out all heating and cooling for safety. If the thermostat is old, you may need to replace it or install a remote sensor to bypass the internal one (Part number 3106486.008 is often used for this purpose). |
| E8 / E9 | Configuration Conflict | These codes signal an invalid zone configuration.[10, 1] E8 means the unit is incorrectly configured to run both the heat pump and the heat strip on the same zone. E9 usually involves a conflict between a dehumidifier setting and heating modes.[10] This is not a hardware failure—it’s a programming error requiring you to access the configuration menu and adjust the settings to match your actual equipment.[1, 10] |
Hard Resets That Actually Work
Digital thermostats utilize microcontrollers that can simply freeze up. Performing a reset is always the mandatory first step to clear glitches.11
Single Zone LCD Reset (CT Single Zone)
The key here is the sequence. You must start in the OFF position:
- Ensure the thermostat is turned OFF.12
- Press and hold the “+” (Up) button and the On/Off Mode button simultaneously for about three seconds.12
- The LCD display confirms initialization has started by displaying two dashes (“– –”).12
Clearing Communications Hangups (Hard Cycle)
If a soft reset fails, you can try a full power reboot to force the thermostat and control boards to re-establish their handshake. Turn the wall thermostat OFF, then physically cycle the 120V AC circuit breakers for your A/C unit(s) off and back on.1
When It’s Time to Replace, Don’t Throw Good Money After Bad
Dometic doesn’t make replacement easy. Some parts are discontinued. Others are bundled into expensive control kits. And if your system is old enough, even a brand-new Dometic thermostat won’t fix it unless you also replace the rooftop board, which requires finding a matching PNC/Product number.
You can spend days tracing wires, checking voltages (which should be between 103V and 126.5V AC for the unit to operate ), and praying that the corrosion you just cleaned off the RJ-11 cable stays away. Or you can recognize that sometimes, the proprietary, aging architecture of your current system is the root cause of the headache.
The WalTech Vision 2.0: The Upgrade That Ends the Guesswork
If you’re tired of proprietary headaches, complex resets, and chasing invisible fuses, there is a better way.
I’ve been watching the rise of WalTech’s Vision 2.0 with more than a little interest. This isn’t some white-labeled knockoff. It’s a patent-pending, purpose-built RV climate controller that speaks Dometic, Coleman, GE, and Furrion’s languages fluently. It plugs into the same RJ-11 ports. It reads the same signals. And it gives you something the old Dometic never could: remote control.
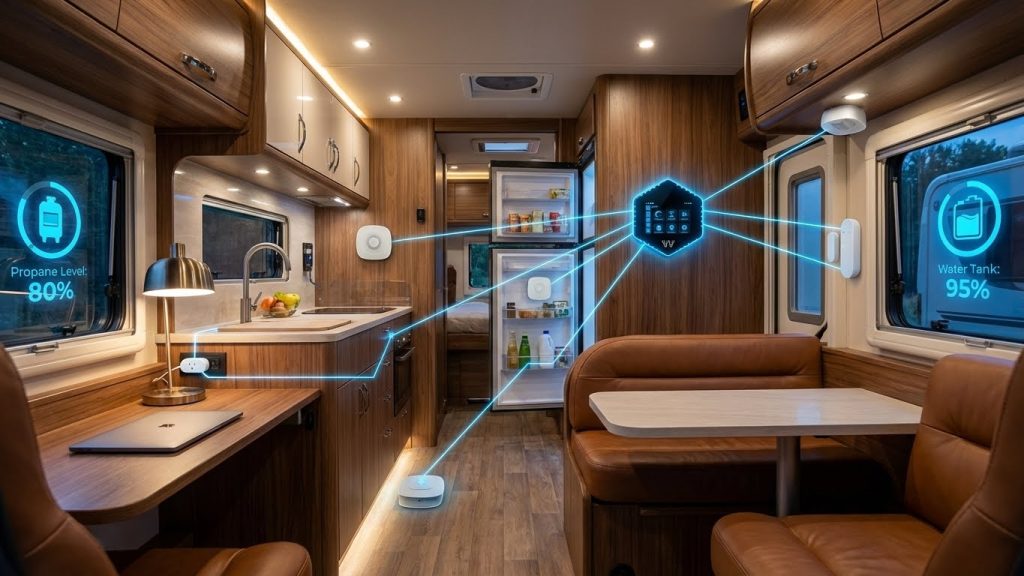
Smartphone Access, Pet Monitoring, Real Diagnostics—Finally
With WalTech, you get Bluetooth and Wi-Fi out of the box. If the temperature spikes while you’re out hiking, your phone tells you. If the humidity creeps into mold territory, you get an alert. It’s the kind of control you’d expect in a modern home—but built for the weird power systems and harsh environments of mobile living.
And installation? If you’ve already got a Dometic system with RJ-11 wiring, it’s plug and play. Less than an hour. No rewiring. No guesswork.
WalTech Vision 2.0 isn’t the future. It’s the fix you’ve been looking for. Because your RV deserves better than silence.