1Your old GE
2How it is wired today
Behind it
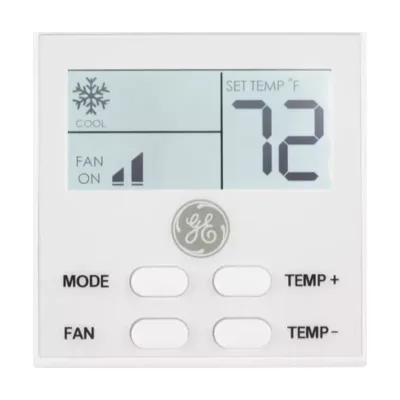
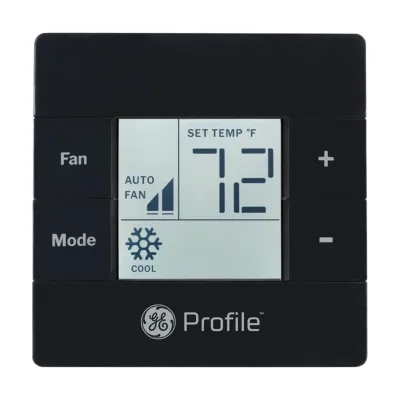
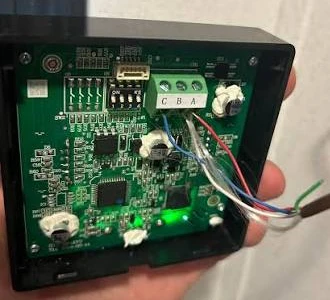
The standard GE or the GE Profile, white or black. First check the model number on the back: it must start with RAR, for example RARWT2B. Behind it are just 3 wires. Two bring power. The middle one is a signal wire: the thermostat sends every command to the AC over that one wire.
3Where it goes on the UST 3.0
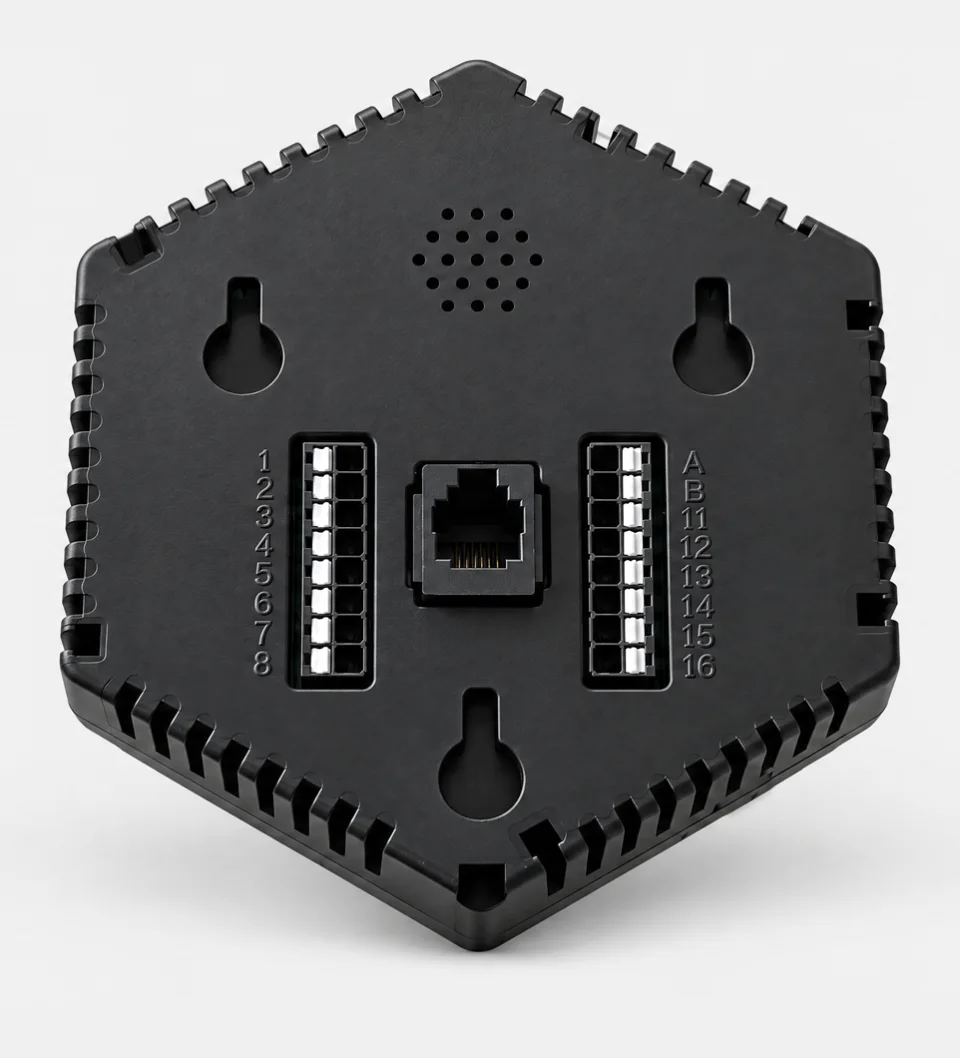
This is the back of the UST 3.0. Every hole has a number.
Pick your old thermostat.
Wire colors can vary. Match by the old thermostat’s labels.
Wiring steps for each GE thermostat
GE single zone
- The +12V power wire goes into 7.
- Cut the black jumper in half. One half goes into 8.
- The other half goes into 16. Join both halves and the ground wire with a wire nut.
- The middle signal wire goes into 11.
Ground: one wire per hole
Each hole takes only one wire. Holes 8 and 16 both need the ground wire. So cut the black jumper from the box in half. Push one half into 8 and the other half into 16. Then twist both halves and the ground wire together under one of the orange wire nuts from the box. A wire nut is the better way to do this. It holds all three wires tight, and each hole only has to grip one wire.
4Do it, step by step
- Turn the power off. Unplug shore power, shut off the generator and turn off the battery switch.
- Take a photo of the back of the old thermostat before you undo anything.
- Take the old thermostat off the wall and free its wires or cable.
- Put the 3 screws in the wall. There is no back plate. Tape the paper template from the box to the wall. It shows where each screw goes. Put in the anchors and the 3 screws, and leave the screw heads sticking out a little. Keep the wires hanging out of the wall.
- Connect it. The wires push straight into the back of the thermostat. Go by where each wire sat on the old thermostat, not by its color. The right wire (power) goes into 7. The middle wire (signal) goes into 11. The left wire is ground.
Ground: holes 8 and 16 both need the ground wire, and each hole takes only one wire. Cut the black jumper in half. Push one half into 8 and the other half into 16. Then twist both halves and the ground wire together under a wire nut.
Strip about 1/4 inch of each wire, push it in until it locks, and give it a gentle tug. - Hang the thermostat. Push it onto the 3 screws and slide it until it locks on all three. Then tighten the travel lock screw on the bottom edge so it cannot slide off. Turn the power back on.
- Tell it what you have. Tap GE, then 3-wire Single-Zone. See this screen. No setup screen? Many thermostats leave the factory already set to another system. Start fresh first: see Controller and heaters.
To take a wire back out, press the small white button next to its hole and pull.
These GE systems do not work with UST 3.0
- All GE R32 systems, standard GE or GE Profile. The model number starts with RGR or RPR, for example RGRWT2B
- GE multi-zone thermostats
- Variable-speed GE AC units
- GE systems run from one central touch screen, like OneControl, Firefly or iN-Command
- GE AC units with a remote control and no wall thermostat
Questions
Which GE RV thermostats work with the WalTech UST 3.0?
GE and GE Profile single zone thermostats on R410A systems. The model number on the back starts with RAR. Models starting with RGR or RPR are R32 and are not supported.
How many wires does a GE RV thermostat have?
Three: power, ground and one signal wire in the middle. On the UST 3.0, power goes into 7 and the signal wire into 11. Ground feeds both 8 and 16: cut the jumper in half, push one half into each hole, and join both with the ground wire under a wire nut.
Not sure which one you have?
Text a photo of your old wall thermostat to 1-844-WALTECH. Text only, no calls.