Before you start
Finish the wiring first. If you have not wired the thermostat yet, start with the wiring guide for your AC brand.
Turn the power back on. The WalTech logo shows while the thermostat starts up. The first time, it then opens the setup screens below. After that it always opens on Home.
Step 1: Your air conditioner
Tap your AC brand along the top, then tap the button that matches your system. Tapping a button takes you straight to step 2.
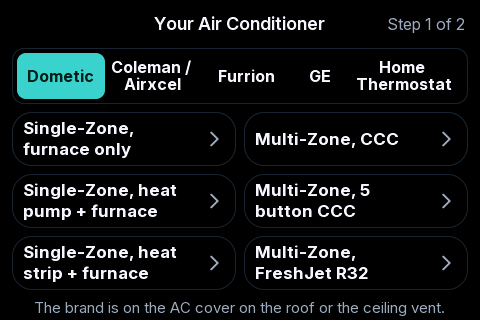
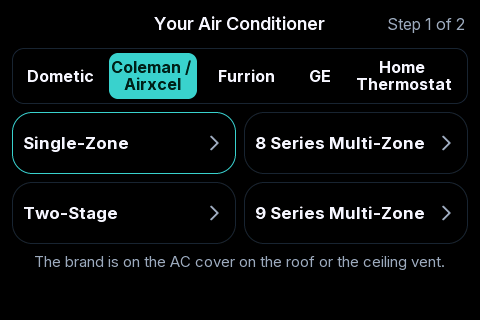
| Brand | Choices on the screen | Pick it when |
|---|---|---|
| Dometic | Single-Zone, furnace only Single-Zone, heat pump + furnace Single-Zone, heat strip + furnace | One AC, and your old thermostat had 3 wires. Pick the line that matches your heat. |
| Multi-Zone, CCC Multi-Zone, 5 button CCC | Your old Dometic thermostat plugged in with a phone-style plug. Pick CCC for 10 or 12 buttons. Pick 5 button CCC for five buttons. | |
| Multi-Zone, FreshJet R32 | A newer Dometic R32 system that came with the Connect Essential thermostat. | |
| Coleman / Airxcel | Single-Zone | One AC with a standard wall thermostat. |
| Two-Stage | An AC with two cooling stages. | |
| 8 Series Multi-Zone 9 Series Multi-Zone | RV Comfort ZC systems. The series is printed on the AC. | |
| Furrion | Single-Zone Multi-Zone R32 Single-Zone R32 Multi-Zone | Pick R32 if your Furrion AC uses R32. Pick Multi-Zone if you have more than one AC. |
| GE | 3-wire Single-Zone | A GE or GE Profile AC with a model number that starts with RAR. |
| Home Thermostat | Standard wiring | A house or cabin system with standard 24V thermostat wires. |
Step 2: Your heaters
Now tell the thermostat what heat you have. There are three lines: Heater 1, Heater 2 and Heater 3 or B&O.
- Tap a line. Each tap moves to the next choice: Heat Pump, Heat Strip, Furnace, N/A. Keep tapping until it shows the right one.
- Do the same for the other two lines. Pick N/A for any heater you do not have.
- Tap Save & Finish.
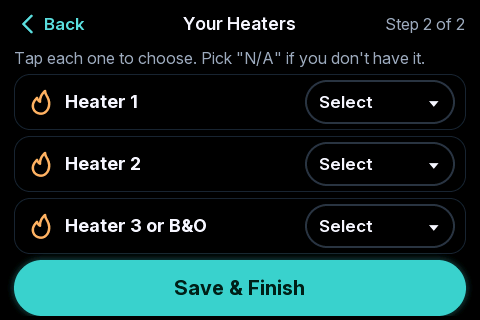
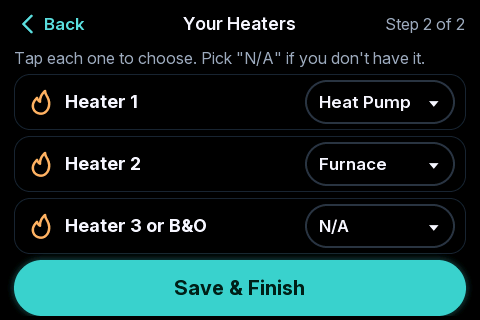
All three lines must be filled in. If one still says Select, the screen asks you to choose all three heaters.
All set
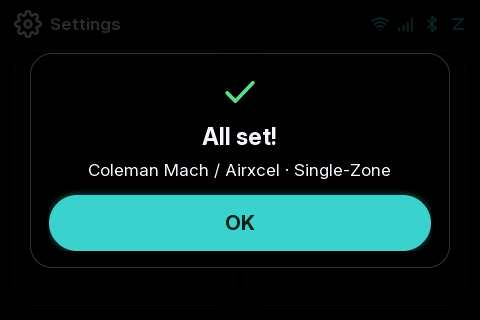
The screen says All set! and shows the AC you picked. Tap OK and you are on the Home screen.
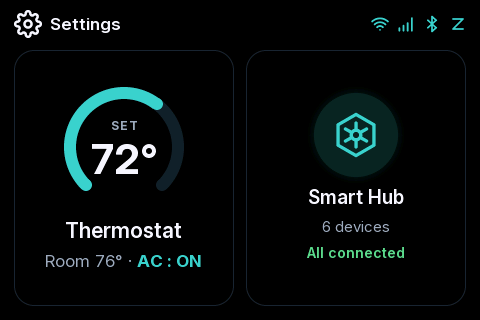
If you have more than one AC, the Home screen shows a box for each zone on its own, once each AC reports its temperature. You do not set the number of zones.
What to do next
Frequently Asked Questions
Still need help?
Text us a photo of your screen at 1-844-WALTECH. Text only, no calls.